The 18650 spot welder is a game-changer for anyone working with lithium-ion batteries. Whether you’re a DIY enthusiast or a professional in the battery industry, understanding how to use this tool effectively can significantly enhance your projects. This guide explores the fundamentals of 18650 batteries, why spot welding is superior to soldering, and the essential components of a reliable spot welder. We’ll also walk you through the step-by-step process of spot welding, highlight common pitfalls, and discuss safety tips. Join us as we dive into the world of 18650 spot welding and unlock its full potential.
What Are 18650 Batteries and Why Use Spot Welding?
18650 batteries are lithium-ion cells widely used in power banks, electric vehicles, and DIY projects due to their high energy density. Unlike soldering, spot welding is the preferred method for connecting these batteries because:
- Prevents heat damage – Soldering generates prolonged heat, risking cell damage.
- Ensures low-resistance bonds – Spot welding creates strong, consistent joints.
- Ideal for mass production – Fast and repeatable for battery pack assembly.
Spot welders apply short, controlled bursts of current to fuse nickel strips to battery terminals without overheating.
Key Components of an 18650 Spot Welder
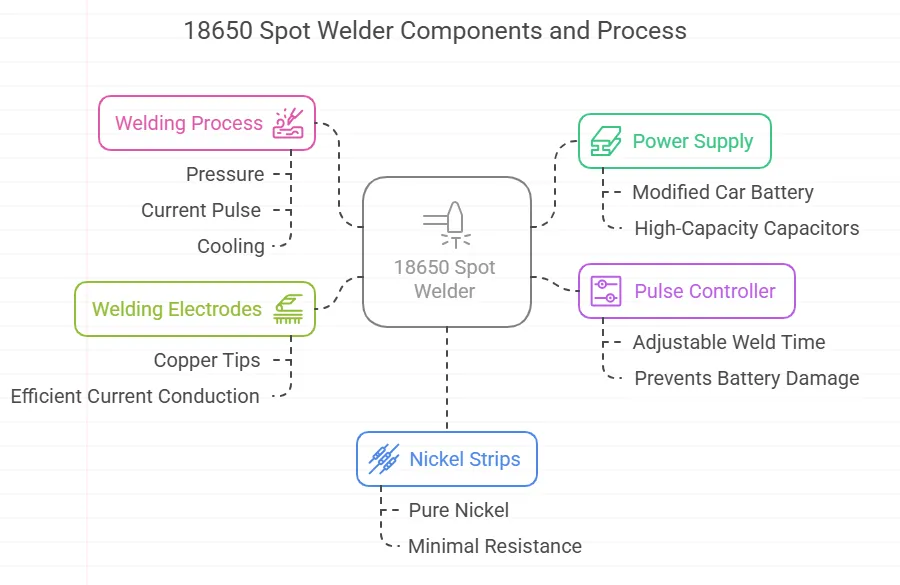
A reliable spot welder requires:
- Power Supply – Typically a modified car battery or high-capacity capacitors (12V–24V).
- Pulse Controller – Adjusts weld time (1–10ms) to prevent battery damage.
- Welding Electrodes (Tips) – Copper tips conduct current efficiently.
- Nickel Strips – Pure nickel (not plated) ensures minimal resistance.
Pro Tip: For hobbyists, a MOSFET-based spot welder offers affordability, while industrial setups use pneumatic systems for pressure control.
How Does Spot Welding Create a Strong Bond?
Spot welding works by:
- Pressure – Electrodes clamp the nickel strip onto the 18650 terminal.
- Current Pulse – A high-amperage burst (500–1000A) melts the metals locally.
- Cooling – The metals solidify instantly, forming a metallurgical bond.
Critical Factors:
- Too little current? Weak bond.
- Too long pulse? Burns through the strip.
- Poor pressure? Inconsistent welds.
Step-by-Step: Spot Welding 18650 Batteries for DIY Packs
Tools Needed: Spot welder, nickel strips, safety gloves.
- Prepare Batteries – Arrange cells in series/parallel configuration.
- Clean Terminals – Remove oxidation with sandpaper (optional).
- Set Welder Parameters – Start with 3ms pulse (adjust as needed).
- Weld Nickel Strips – Press electrodes firmly for 1–2 seconds per spot.
- Test Connections – Check resistance with a multimeter.
Common Mistakes:
- Overlapping strips (causes short circuits).
- Uneven pressure (leads to failed welds).
Applications: Hobbyist vs. Commercial 18650 Spot Welding
- Hobbyists – Build custom power banks, e-bike batteries, or solar storage.
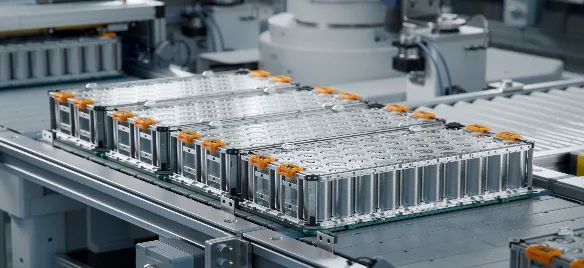
- Manufacturers – Scale production for EVs (Tesla-style battery modules).
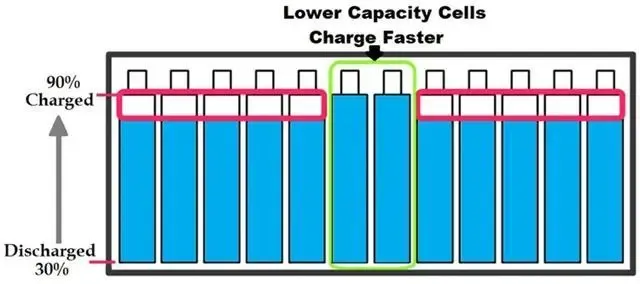
Safety Note: Always balance-charge welded packs and use a BMS (Battery Management System).
Why ESD Protection Matters for 18650 Battery Spot Welding
Electrostatic discharge (ESD) can damage lithium-ion cells during welding, leading to:
- Reduced lifespan – Internal short circuits degrade battery performance.
- Safety hazards – Sparks may ignite flammable electrolytes.
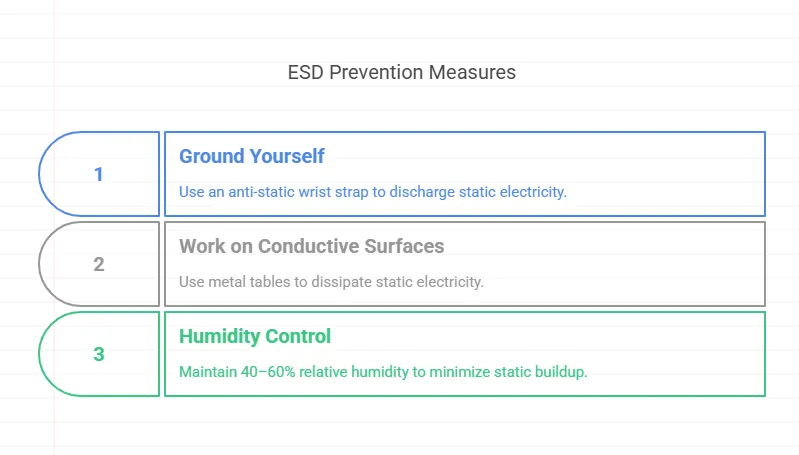
How to Prevent ESD:
- Ground Yourself – Use an anti-static wrist strap.
- Work on Conductive Surfaces – Metal tables dissipate static.
- Humidity Control – Maintain 40–60% RH to minimize static buildup.
Note: Never handle 18650 cells with bare hands if you’ve been moving on carpets or plastic surfaces.
How to Test 18650 Spot Weld Strength (Pull Test & Visual Inspection)
A weak weld can cause battery pack failure. Use these methods:
1. Pull Test (Destructive)
- Grip the nickel strip with pliers and pull vertically.
- A good weld won’t detach; the strip should tear before the bond fails.
2. Visual Inspection (Non-Destructive)
-
Check for:
- Discoloration (indicates overheating).
- Inconsistent marks (uneven pressure).
- Gaps between strip and terminal.
Industry Standard: A weld should withstand 2–5kg of force (depends on strip thickness).
Step-by-Step: Safely Handling 18650 Cells During Welding
Pre-Welding Prep:
- Inspect Cells – Discard any with dents or leaks.
- Use Insulated Tools – Prevents accidental shorts.
- Secure Batteries – A non-conductive jig avoids movement.
During Welding:
- Avoid Overlapping Strips – Prevents cross-connections.
- Limit Heat Exposure – Weld in <5ms pulses to protect cells.
Critical: Keep a Class D fire extinguisher nearby for lithium fires.
How to Clean Electrodes & Replace Welding Tips for Optimal Performance
Dirty electrodes cause poor conductivity and weak welds.
Cleaning Steps:
- Power Off – Disconnect the welder.
- Sand Electrodes – Use 400-grit sandpaper to remove oxidation.
- Wipe with Alcohol – Removes carbon buildup.
When to Replace Tips:
- Pitted or deformed surfaces.
- Frequent sparking during welds.
- Inconsistent weld marks.
Pro Tip: Copper-tungsten tips last longer than pure copper.
This comprehensive guide focuses on the 18650 spot welder and its role in battery assembly. It explains why spot welding is preferred over soldering, emphasizing its ability to prevent heat damage, ensure low-resistance bonds, and facilitate mass production. The article breaks down the key components of a spot welder, including the power supply, pulse controller, welding electrodes, and nickel strips. It also delves into the mechanics of spot welding, detailing how pressure, current pulses, and cooling create strong metallurgical bonds. Step-by-step instructions for spot welding 18650 batteries are provided, along with tips for avoiding common mistakes. The guide covers applications for both hobbyists and commercial users, the importance of ESD protection, methods for testing weld strength, and safety precautions. Finally, it offers advice on maintaining and replacing welding tips to ensure optimal performance.